


A clothing tech pack is the set of instructions a manufacturer uses to turn a design into a garment. It explains what the garment looks like, what it is made from, how it should be constructed and what its measurements should be. A sketch communicates the idea. The tech pack gives the factory the details needed to make it.
Tech pack software helps you build those instructions and keep them up to date. In 2026, that can include asking an AI agent to create the product record, draft a measurement chart and help complete missing information. This guide explains the contents first, then shows how those tools work in Lifecycle.
What should a clothing tech pack include?
Consider a zip-up hoodie sold in black and cream, in sizes XS to XXL. The factory needs more than a front-view drawing. It needs to know which fabric to use, whether the hood is lined, which zip belongs in each colour, how wide the chest should be and where the label goes. Those instructions usually sit in the following sections.
- Product details: the style name or number, season, supplier, size range and colour options.
- Technical drawings: front, back and detail views showing the garment’s shape and construction.
- Measurement chart: the dimensions for each size, how to measure them and the permitted variation.
- Bill of materials: the fabrics, trims, labels and packaging needed for each garment.
- Construction and artwork instructions: seams, stitching, finishes, print or embroidery placement and dimensions.
- Sample feedback and revisions: what changed after reviewing a physical sample and what the factory should make next.
The level of detail depends on the garment. A basic T-shirt and a lined waterproof jacket need different instructions. A useful tool lets you add the pages your product requires without rebuilding the whole document.
Product details and colourways
A colourway is one colour version of the same design. Our hoodie has two: black and cream. Both may use the same shape and measurements, but they need different fabric colours, matching thread and possibly different zip finishes.
Keep the style identifier, size range and colourways in the product record so the factory can tell which garment the pack describes. In Lifecycle, you can prepare a tech pack for a particular vendor and choose the variants it should include. If one factory only makes the black hoodie, its pack can show that version.

Technical drawings and construction instructions
A technical drawing, often called a flat, shows the garment clearly without the pose or styling of a campaign photograph. Front and back views explain the overall shape. Detail views show features such as the pocket opening, zip guard or hood seam.
Annotations are labels or arrows on those drawings. For the hoodie, an annotation might identify where the ribbed cuff attaches or point to the required zip. Construction notes explain how to make that detail: the seam or stitch type, finish, placement and any dimensions the factory needs. Prints and embroidery also need placement, size, colour references and the relevant artwork files.
In Lifecycle Tech Pack Studio, you can add image, measurement, BOM and construction pages. Numbered annotations can link a drawing detail to its material or measurement row, so the factory can find the corresponding instruction. Artwork can come from an uploaded image, Adobe Illustrator or Lifecycle’s design tools.

Measurement charts, points of measure and grading
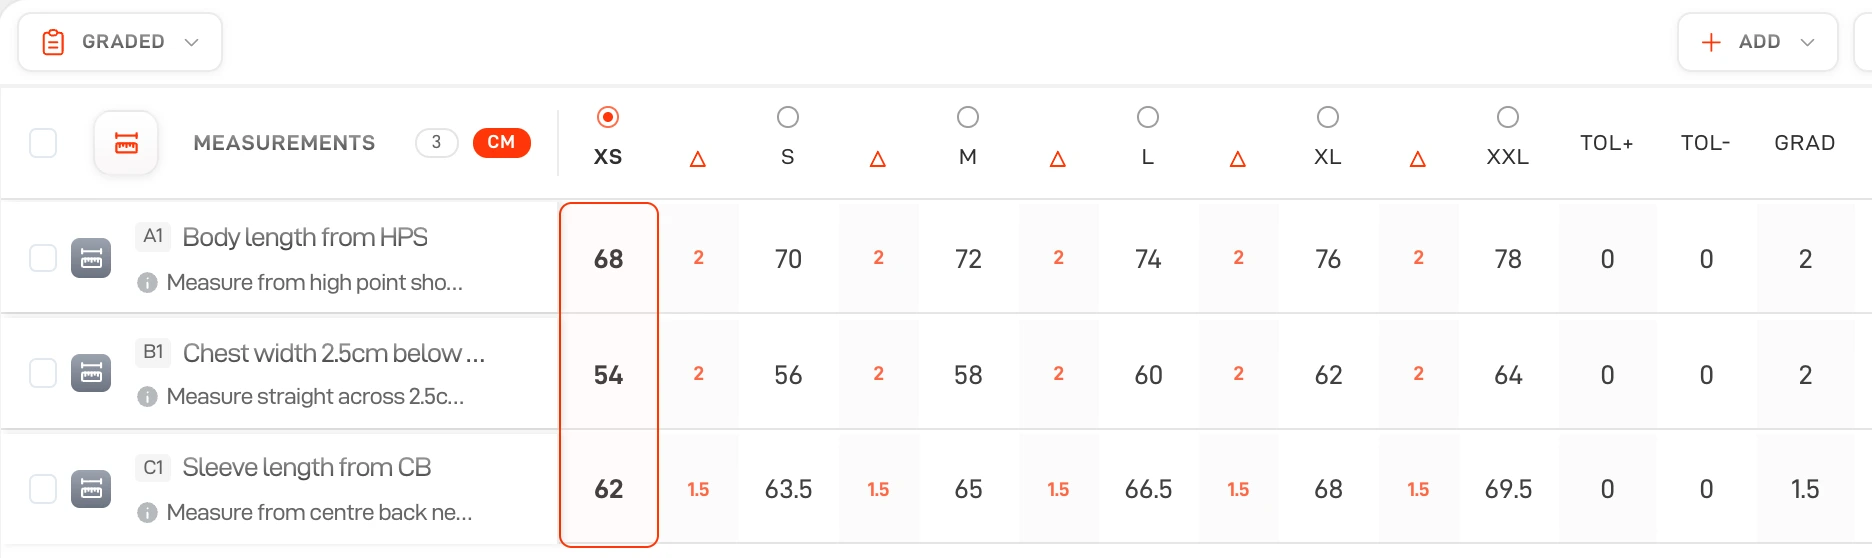
A point of measure, or POM, is a specific dimension on the garment. Chest width, sleeve length and hood height are examples. Each one needs a name, a measuring method and a value. “Sleeve length” alone is ambiguous: the factory also needs to know where the measurement starts and ends.
The measurement chart brings those points together. It should identify the unit, the size being measured and a tolerance: how far the finished garment may differ from the target before it needs attention. For example, a hypothetical chest-width specification of 60 cm with a tolerance of ±1 cm allows a measured width from 59 to 61 cm. Your technical designer sets the appropriate values for the garment.
Grading means changing the measurements between sizes. A size M hoodie and a size XL hoodie should not simply have identical values. Grade rules define how each dimension changes through the size range. Different dimensions can use different increments; hood height need not increase at the same rate as chest width.
Lifecycle stores POMs, how-to-measure instructions, tolerances and grade rules. You can reuse a measurement template, bring in an existing chart or generate a draft with AI. Automatic grading applies the size increments, reducing the work of filling each cell by hand. Sample measurements can then be recorded against the requested specification, so you can see where the physical garment differs.
Bill of materials: fabrics, trims, labels and packaging
The bill of materials, usually shortened to BOM, is the list of everything needed to make and pack the garment. For our hoodie, that could include body fabric, hood lining, ribbing, a zip, drawcord, eyelets, thread, a brand label, a care label and a packaging bag.
Naming the item is only part of the job. The factory needs its specification or library reference, where it is used, the required quantity and unit, and the correct colour for each colourway. “Black fabric” is not enough if your brand has several black fabrics with different weights or compositions.
In Lifecycle, BOM lines can reference reusable materials and trims from your library. Each line can hold its placement and quantity per piece, with colour assignments for the product variants. You can save a BOM template for similar styles and place linked component annotations on the drawing. The product’s BOM supplies the tech-pack table, rather than someone typing the same list into a separate document.
Automatic annotations and AI-generated measurements
Drawing every measurement arrow and building every chart from an empty table takes time. Lifecycle’s Auto-Annotate tool can place existing points of measure on the garment image, or propose new POMs from the design. It also supports BOM annotations. You review the proposed markers and can move or edit them on the canvas.
The measurement generator uses a garment description and size range to draft a POM list. Describing a “drop-shoulder zip hoodie with a lined hood and ribbed cuffs” gives it more useful information than simply writing “hoodie”. You can request POM names alone or use the beta option that also proposes measurement values.
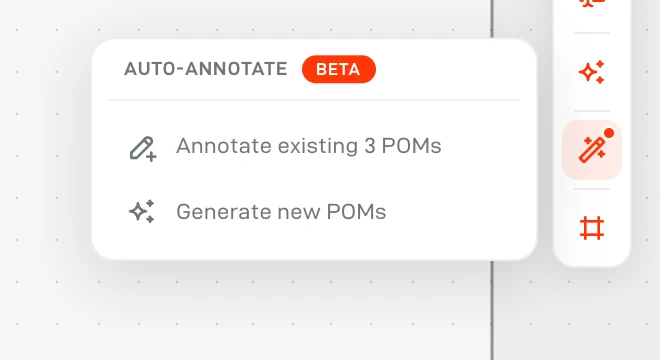
Generated values are a starting point, not measurements taken from your approved garment. Check them against your brand’s fit block or physical sample, and check that each arrow matches your measuring method. Auto-Annotate and POMs + Values are beta features; unusual shapes may need manual corrections.
Agentic tech packs: ask AI to help build the specification
“Agentic” means the AI can carry out tasks inside the software, rather than only giving you text to copy and paste. In Lifecycle, Ask AI can create products, add or change BOM components, load measurement templates, add points of measure, grade sizes and add tech-pack views. Changes to those records are presented for your approval.
You can ask the agent to help create a tech pack from your design and brief, then work through the details with it. For example, you might ask: “Create a product for this zip-up hoodie in black and cream, sizes XS to XXL. Load our hoodie measurement template and add a BOM using the materials I’ve supplied.” Use the actual names of your templates and materials so the request is specific.
- “What information is missing from this product?” helps you review the record before sharing it.
- “Add points of measure for hood height and pocket width” builds out the chart instead of leaving you to create each row.
- “Load the hoodie measurement template” reuses your existing specification.
- “Record the sample actuals from the attached sheet” brings the factory’s measurements into the product for comparison.
That is how an agent can help fill gaps: use the information and approved templates you already have, or propose a draft for you to review. It should not silently turn an unknown fabric specification or untested measurement into a confirmed production requirement. You still decide what is correct, approve changes and share the finished pack with the vendor.
How this differs from making a tech pack manually
With Illustrator, spreadsheets and a PDF export, your team may draw each arrow, enter the measurement table, copy the materials list and assemble the pages. When a detail changes, someone needs to update every affected file and send the factory a replacement.
A connected tool reduces that repeated entry because the drawing, BOM and measurements belong to the same product. AI adds another way to do the work: draft the chart, propose annotations or ask the agent to update the record. The advantage is less manual setup and copying, while the designer retains control of the specification.
Software products differ, and an “AI” label does not tell you which tasks a tool can perform. When comparing options, ask the provider to build a pack for a garment you understand. Can it generate a measurement chart? Are arrows linked to the chart? Can you edit the result? Can an agent change the product data, or does it only answer questions? Those are specific capabilities you can see in a demonstration. Our PLM versus spreadsheets guide explains the wider workflow differences.
Sample feedback, revisions and supplier sharing
The first physical garment from the factory is a sample. You measure it, inspect the materials and construction, and record what needs to change. If the hoodie sleeve is too long, the factory needs the revised sleeve measurement and a clear instruction for the next sample. A comment such as “fix the fit” does not give it enough information.
Lifecycle connects sample rounds to the product and vendor tech pack, with measurements and feedback kept alongside the work. Our sample-management guide explains that review process. Keep the approved requirements clear before requesting another sample or starting production.
To share a pack, Lifecycle provides a link and a four-digit PIN. The factory opens the link and enters its details and PIN to view the document without needing an account. A live pack reflects the current product information; a downloaded PDF is a fixed copy. If you need the supplier to work from a specific saved revision, check and set the version before releasing it.

Vendor access and communication matter as much as creating the pages. Our supplier-management guide covers those responsibilities in more detail.
How to choose tech pack software for your brand
Start with one of your own garments and ask to see its complete pack: product details, drawings, measurement chart, BOM, construction notes and supplier view. Then change a measurement or component and check what the factory sees. This tells you whether the software handles your actual work.
Ask which features are included in the quoted subscription, whether AI usage costs extra, and how supplier access is charged. If you already have packs in spreadsheets or PDFs, ask how their data becomes editable in the new system. Our migration guide covers the checks to make, and the small-brand PLM guide helps you decide whether you need a broader product platform.
We build Lifecycle, so this article explains our own approach. If you want to see it with your product, bring a design or existing pack to a demo. We can show the manual controls and AI tools together, including what you review before the pack goes to a factory.